With GetW9’s QuickBooks® integration, you can import vendors from QuickBooks into GetW9 to send W-9 requests, and export vendors back to QuickBooks once W-9 forms are completed. This guide will walk you through both processes step by step.
Importing Vendors from QuickBooks into GetW9
Step 1 – Navigate to Integrations
From your GetW9 Dashboard, click on Integrations in the left menu.

Step 2 – Select Import Vendors
Choose your connected QuickBooks® company and click Import Vendors.

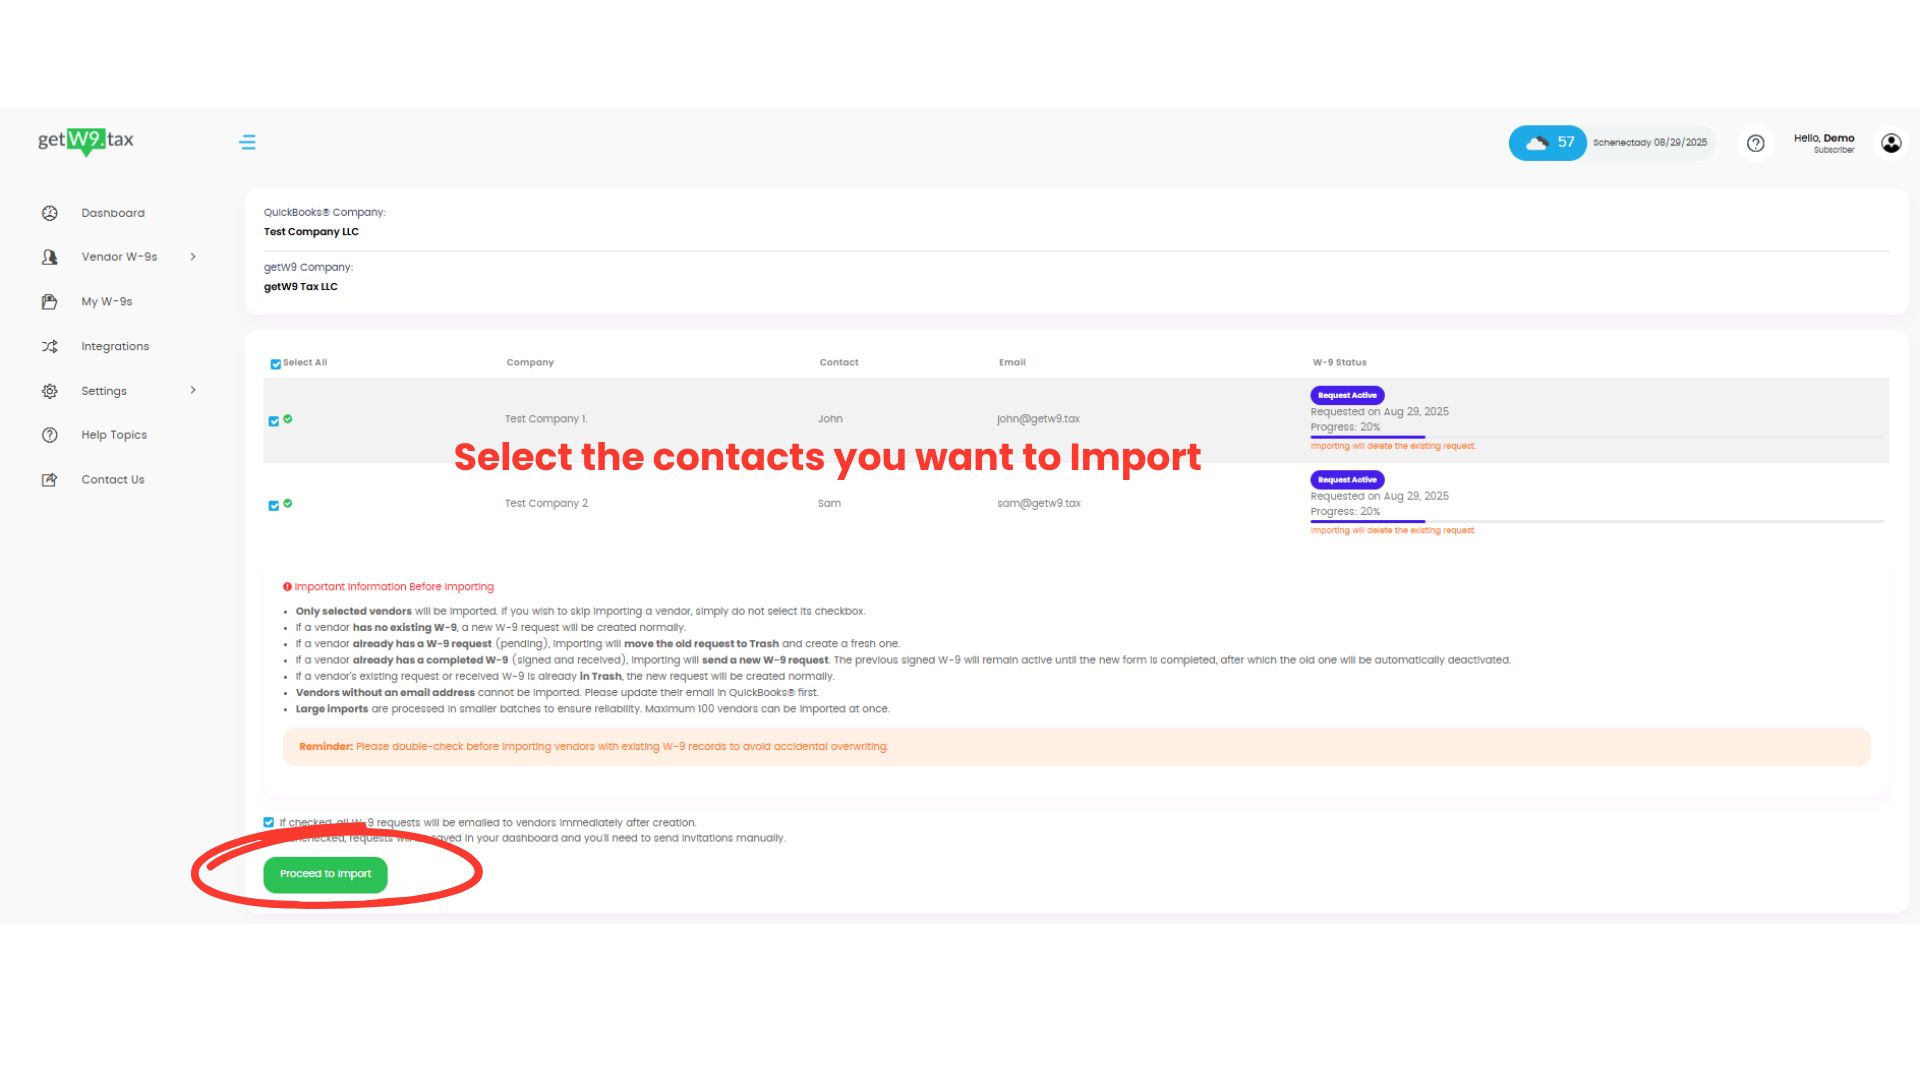
Step 3 – Choose Vendors to Import
Select the vendors you want to bring into GetW9.
If a vendor has no W-9, a new request will be created.
If a vendor already has an active W-9 request, importing will move the old request to Trash and create a new one.
If a vendor has a completed W-9, a new W-9 request will be sent.
Once ready, click Proceed to Import.

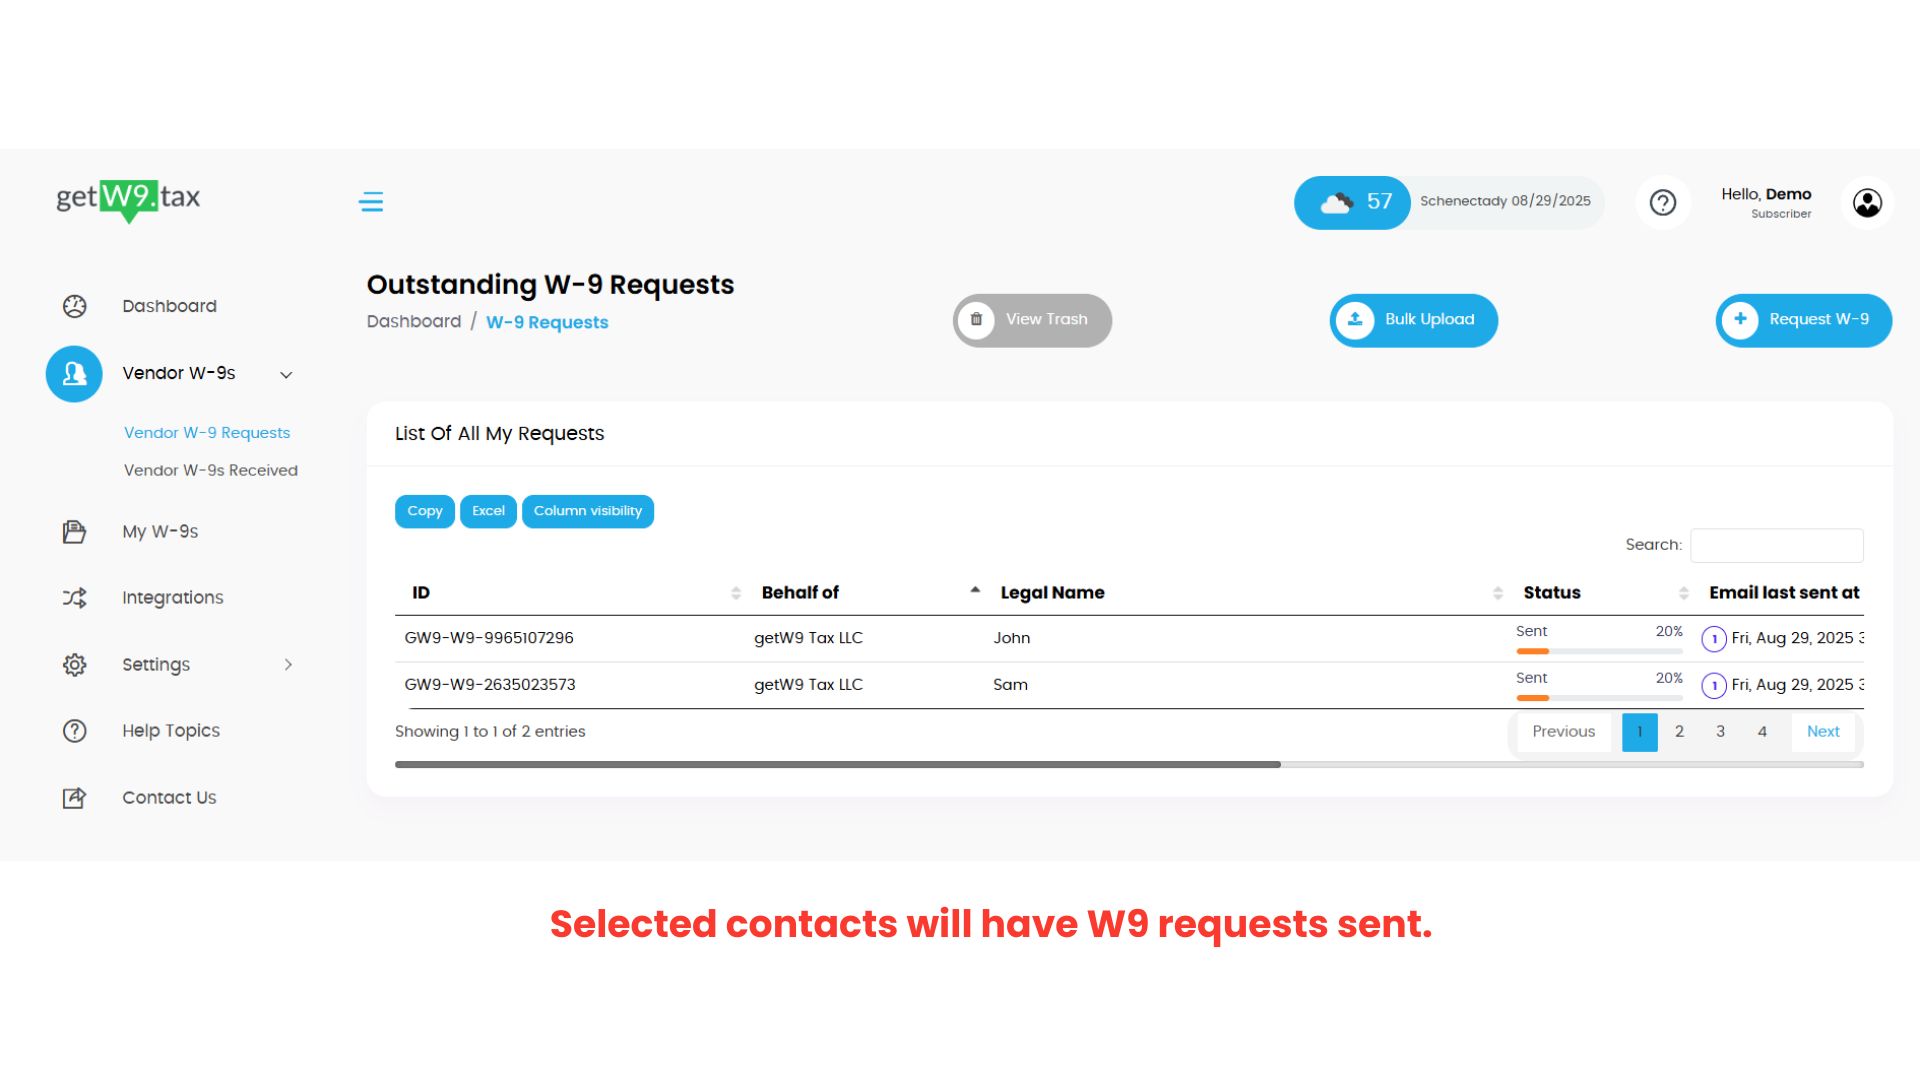
Step 4 – W-9 Requests Sent
The selected vendors will automatically receive W-9 requests in GetW9. You can track them under Vendor W-9 Requests.

Exporting Vendors from GetW9 to QuickBooks®
Step 1 – Select Export Vendors
Go to Integrations → choose your company → click Export Vendors.

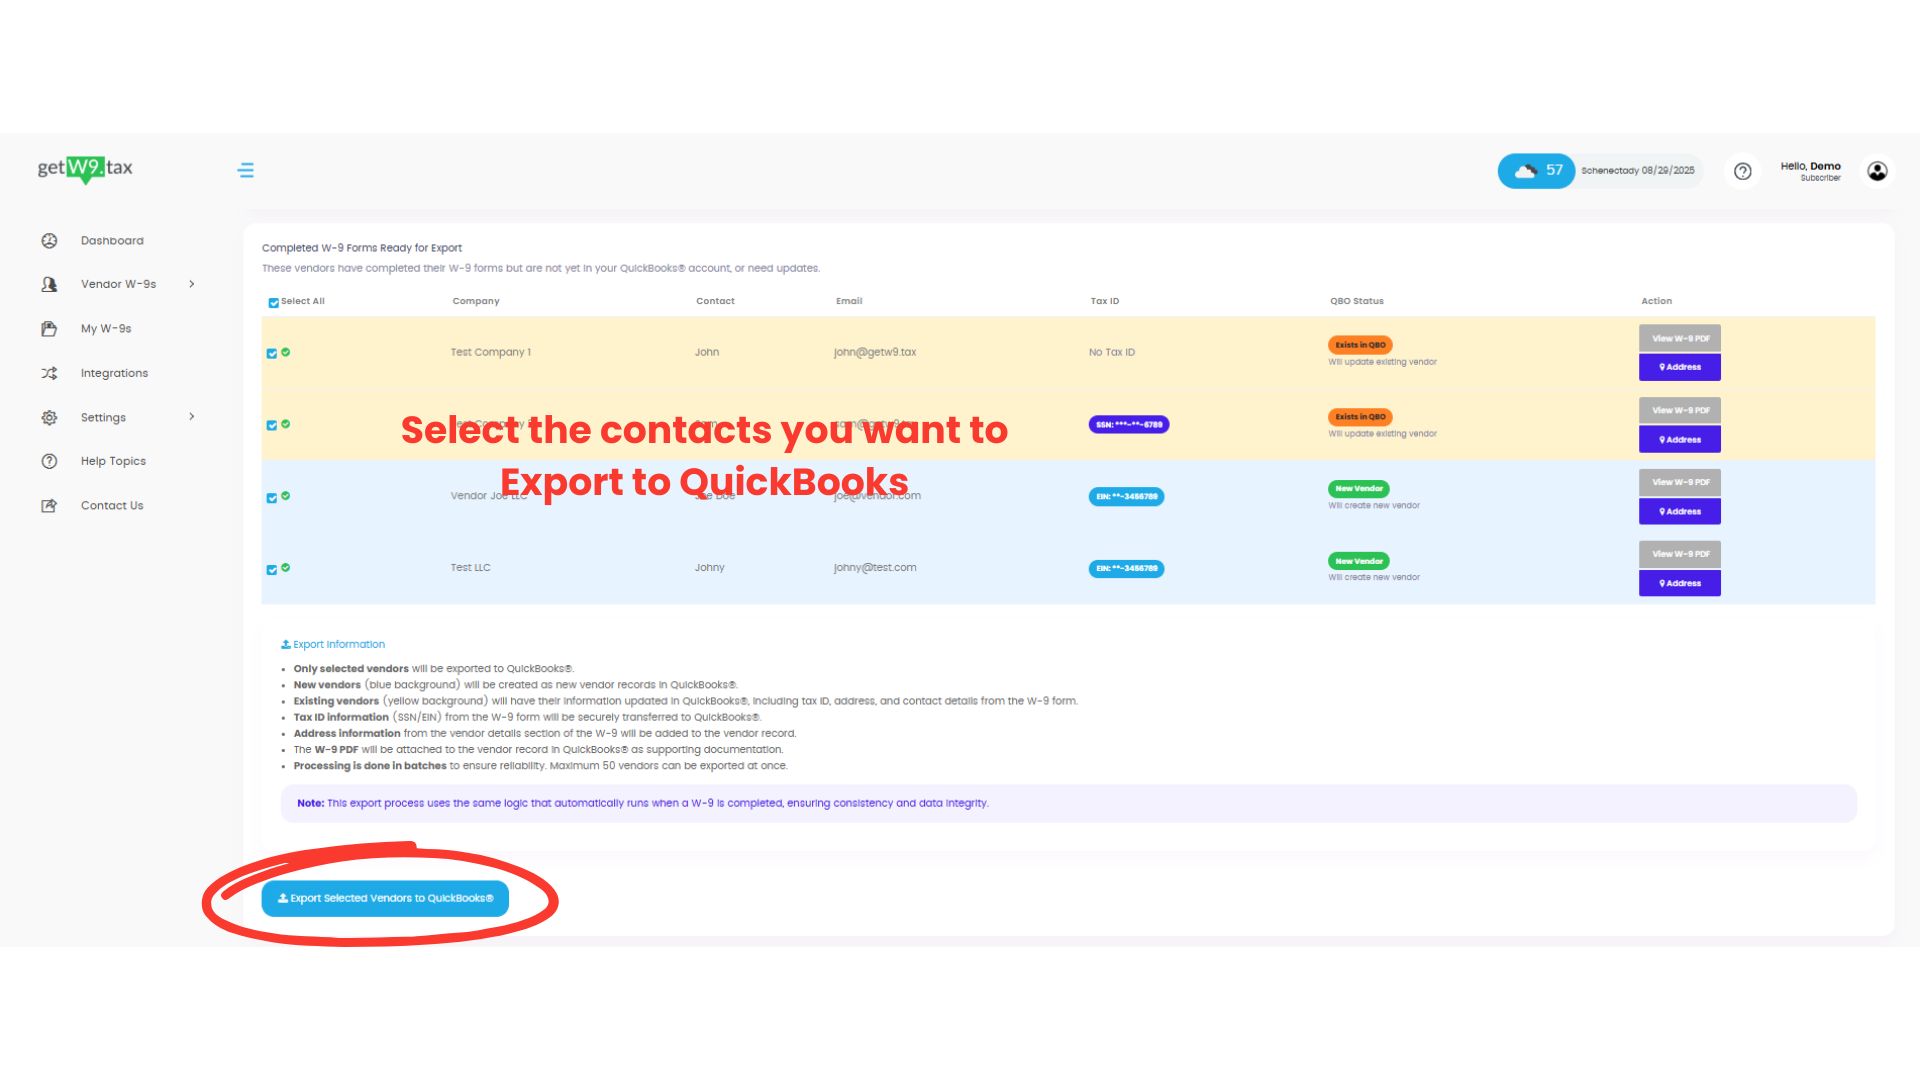
Step 2 – Choose Vendors to Export
Select the vendors whose W-9s are completed and ready to sync back to QuickBooks®.
Blue background = New vendors → will be created in QuickBooks®
Yellow background = Existing vendors → will be updated in QuickBooks® with new tax ID, address, or contact details.
Click Export Selected Vendors to QuickBooks.

Step 3 – Vendors Exported
Once complete, the vendors will appear in your QuickBooks® account.

Was this article helpful?
That’s Great!
Thank you for your feedback
Sorry! We couldn't be helpful
Thank you for your feedback
Feedback sent
We appreciate your effort and will try to fix the article